 |
| Decorative Christmas Boxes |
Sometimes you just need a little box or maybe three! They can be used for decorating or for gift giving. These cute little boxes are easy to create and inexpensive as well.
I purchased these paper mache
boxes at my local craft store A.C. Moore. They cost $1.00 each. You could also
use small tins instead or even large ones depending on your particular need.
Directions for making gift
boxes:
- Purchase or locate, if you
already have some, your gift boxes or tins
 |
| Paper Mache Boxes |
- Paint the outside and top of each one - I spray painted them with red
and green spray paint. You could use anything you want - white or blue would be
great too.
- While they are drying, create
the fabric tops for each lid. These are actually yo yos. If you have never made one,
they are easy.
- Find a fabric that you want
to use for your yo yo – I used all Christmas fabrics, but these would work for any
holiday.
-Measure the diameter of your
box lid - mine where 4 inches across
 |
| Measure the Diameter of the Lid |
- You will need to double the
diameter - my total was 8 inches across. You can use a compass to draw the
circle, a plate or bowl if it is the exact size. You can use cardboard to make
a pattern or if you are brave like me, I just did it directly onto the fabric.
Make sure you use the backside of the fabric to draw your circle.
- Once you have your circle,
cut your fabric.
 |
| Cut Circle for YoYo |
|
|
- You will now need a needle
and a long piece of thread that will go all the way around the circle. The color of the thread is not important for this.
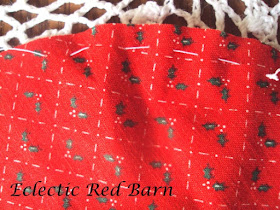
- Begin on the right side and
move in about 1/4 inch from the edge. Weave the thread around the edge of the
material. Shorter
stitches create a larger, more open center on your yo yo. Longer stitches make
for a tighter yo yo center.
 |
| Stitching Outside of Circle of Yo Yo |
|
 |
| Stitched Around Yo Yo Circle |
- Once you have gone all the
way around, you are ready to begin pulling the thread.
 |
| Pulling Thread on Yo Yo |
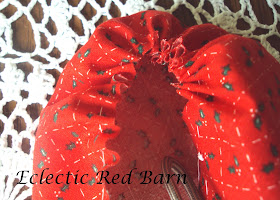
Gradually pull the thread
until it resembles the picture below.
 |
| Finished Yo Yo |
- The gathered part should be
in the center, you my need to adjust this.
- Complete one for each box lid.
- Use Elmer's glue to attach
the fabric yo yos to the top of the box. I just put glue on the outside edge
all the way around and some in the middle.
- Press the yoyo onto the lid
making sure it reaches to all the edges.
- Let the yo yos dry. (You can fluff it up once it dries)
- You can add any decorative
items on top. On one I added a vintage button and jute, on another, a small ornament,
on the third I added a cardboard decoration from Martha Stewart that I
purchased at the end of the season on sale. They have a sticky back to them so
when you remove it, it will stick to the top.
 |
| Decorated Christmas Boxes |
 |
| Box Lid Decorated with Jute and Vintage Button |
 |
| Box Lid Decorated With Martha Stewart Decorative Trims |
- I decided to decorate the
sides of the lids as well. On one I added some lace and then a thin red ribbon,
on the second one I put a gold ribbon around the band of the lid, on the third
I added some trim from Martha Stewart. These are really great since they have a
sticky back to them. All you have to do is peel the paper off and stick it on
the each of the lid.
 |
| Decorated Lid Edge with Martha Stewart Trim |
 |
| Decorated Lid Edge with Lace and Ribbon |
 |
| Martha Stewart Christmas Trims |
You could just add some decoration to the top
and not add the yo yo. Let your imagination run wild!
They can be decorative or fill them with candy or nuts to give as gifts.
 |
| Pecan Filled Decorative Boxes |


Very Cute!
ReplyDeleteThose are so cute! A great way to present gifts for the holiday :)
ReplyDeleteThanks so much for linking up,
<3 Christina at I Gotta Create!